A kids toy might be your new best friend

Injury prevention

It’s not often I get go full on geek with people that care as much about movement and self-care as much as I do. This last weekend I got to do that with Ryan Esdohr and Matt Johnson at Superhuman Lab as a guest on their podcast.  Before the recording I gave Ryan one of my low cost repurposed mobility tools. The WHAM-O SUPER DUPER BALL. It’s a kid’s toy that’s been around forever.  Not only is it fun to spike at the ground and bounce it a about a mile high it’s a great substitute for more expensive balls for marketed for soft tissue work.

The closest thing I can compare the WHAM-O to is a Yoga Tune Up Alpha Ball. Alpha balls are awesome and I’m all about supporting teachers like Jill Miller that put a vast amount of quality content out on the web for free but if you’re just getting started or looking for a large, medium firmness ball to put in the tool box and want to save a buck the WHAM-O is a great option.

Compared to the Alpha it’s a little bigger, a little firmer and a little less grippy none of these properties make it better or worse than the Alpha it’s just different. It does seem to be more durable and tolerant of heat and direct sunlight so it does hold up a little better if you want to keep it in your car or something like that.

img_3549

You can buy them for as cheap as $4.00 if you keep an eye out for them at Aldi in the summer or you can order them all year long from amazon for about $8.00 which will still get you started a for less than half of the cost of an Alpha ball.

https://www.amazon.com/Yoga-Tune-Alpha-Ball-Miller/dp/B00NP280XY/ref=sr_1_1_a_it?ie=UTF8&qid=1500144337&sr=8-1&keywords=alpha+ball

https://www.amazon.com/Wham-O-Super-Duper-Ball-Colors/dp/B005KDCTSS/ref=sr_1_1?ie=UTF8&qid=1500144394&sr=8-1&keywords=whamo+super+duper+ball

It took Ryan less than a day to go to work with the WHAM-O and he started putting out some good content. Little did he know he put together a great series for cops so I’m gonna borrow it.  

Smashing the lil glutes. Watch this video and think about where your duty belt traps your hips. The belt compresses the glute medius, glute minimums and TFL all day long. Getting a little soft tissue work in this area once or twice a week is key to keeping the hips mobile and healthy.

Hamstrings- You sit on them in the patrol car 30+ hours a week and chances are you stack on another 30+ on that at home.  That’s a lot of time with heat and pressure to turn the that meat into the human tissue equivalent of grilled cheese.


Rectus and high hip flexors- Pay extra attention to the first part of the video here. The high hip flexors get gnarly from all of the sitting especially where the belt tends to rest on the thigh.  Work the whole leg and remember it should not cause you pain. If your quad is screaming at you chances are that’s where you need to work. Take your time, hang out there, relax and breathe.


Rethinking the sit-and-reach test.

Injury prevention

Use of the sit-and-reach test in a pre-employment physical fitness battery needs to be reconsidered. Currently 13 out of 50 states still use it which means thousands of departments use it, and I cant find any research to validate its use. The best I can figure its used because of the Presidential Physical Fitness Challenge. The sit-and-reach test is based on the theory that perhaps sitting down and bending forward is a good measure of hamstring and low back extensibility. It only makes sense that screening for these qualities would be a good way to eliminate those who are predisposed to low back injury which is a significant source of missed days of work and disability retirement. Unfortunately this logic is not necessarily backed by research.    

My initial interest in validity of the sit-and-reach test comes from my personal experience. Ill make a long story short. When I was a bulletproof 21 year old who was aspiring to be a cop I CRUSHED the sit-and-reach test. Not that it was a competition, but I won most of them with scores reliably in the 20s (note: 15 is touching your toes). Fast forward in my life to my early years as a cop when I had to sleep on the floor and I was taking 800 mg doses of ibuprofen daily because my back hurt all the time. Before I was a cop I had a few episodes of “tweaking” my back. Usually it was an upper neck and thoracic area, and it would resolve quickly especially with a little chiropractic assistance. The pain I was having as a new cop was constant and chronic. Good pain-free days were outnumbered 5-1 with painful days. This always bothered me because I figured that being the flexible bendy guy that I was I should be immune to back issues. Obviously this notion was wrong. Either I was an exception to the rule and was predisposed to back pain despite my flexibility or maybe the sit-and-reach test isnt a valid predictor of predisposal to back pain.

I took some time to do the research; heres what I was able to find.

The sit-and-reach test appears to be a good measure of hamstring extensibility but may not be a good measure of low back extensibility. The sit-and-reach may not even measure what it is designed to measure.

Overall the SR tests have a moderate mean correlation coefficient of criterion-related validity for estimating hamstring extensibility, but they have a low mean criterion-related validity for estimating lumbar extensibility.

https://www.ncbi.nlm.nih.gov/pmc/articles/PMC3918544/

The sit-and-reach test is poorly correlated to back pain (This study also indicates that a the sit-up test is poorly correlated to pain).

In conclusion we found the sit-up and sit-and-reach tests lack criterion-related validity with LBP for inclusion in health-related fitness testes. Inclusion of such items should not be based on a presumed relationship between test performance and LBP

http://www.jospt.org/doi/pdf/10.2519/jospt.1998.27.1.22

 The sit-and-reach test is a poor predictor of previous back injury in industrial workers.

The S&R test, among many collected, was performed according to the CPAFLA guidelines. History of low back discomfort (LBD) was categorized based on whether or not time was lost from work. The S&R test was unable to distinguish between those with a history of LBD and those without.

This is important because the best predictor of an injury is previous occurrence of an injury and its severity. Lets spin this backwards for a second. If the sit-and-reach test doesnt have a good correlation to the best predictor of a future injury then its probably not a good predictor at all.  

With all of this information going against the use of the sit-and-reach I did reach out to Dr. Stu McGill who brought his colleague Dr. Jack Callaghan into the conversation. For those who dont know, McGill is arguably the worlds foremost expert of the back and spine.  McGill literally wrote the text book on low back disorders. Both McGill and Callaghan were surprised to see the combination of the sit-and-reach and sit-up tests in use for pre-employment screening.

Dr.  McGill went so far as to say that he would have thought that American employment law would have forced a job-content valid testing procedure.

Callaghan echoed McGill’s criticism stating that “The link to the test being relevant for the job performance must be clearly demonstrated” 

McGill has criticized both the sit-and-reach and sit-up tests stating:

The sit-and-reach is more a test of arm length and had nothing to do with back health. Our studies have shown the more the flexibility the greater the risk of back disorders, also we have also shown that this mobility did not predict who would recover from back injury to return to work.”

In a T-Nation interview Dr. McGill mentions problems with the sit-up test arguing that repetitive spinal flexion delaminates the discs leading to back injury. The problem with having this in a test is that those being tested are likely to train for the test and do a bunch of sit-up and injure their backs.  

My real issue with the sit-and-reach test is simply this: We can do better and we are not. I dont know if there is a stand-alone screen that appropriately predicts future low back injury.  With the abuse that a cop will put their back through with extended periods of compromised sitting over 30 years, good backs will go bad without maintenance. If we cant reliably screen for the back problems, then time needs to be spent teaching cops how to take care of their back. You should within your first year of being a cop be taught how to optimize your body positions, identify mechanisms that are causing pain when it happens, and you should be given an evidence based physical practice to increase stability and appropriate levels of flexibility. This isnt a thing right now so for the sake of time Im going to let Dr. McGill lay down some knowledge.

The book thats promoted in the video is a game changer for understanding your back issues and developing strategies to get out of pain. Im not a one size fits all kind of guy but what I can tell you is that my back issues tend to correlate to my hip mobility and spine stability, and this appears to be true for most cops probably because we have similar environmental stressors. Ive done some writing on the hip mobility piece, but heres Dr. McGill again on some exercises to promote low back stability. Work them in today then go buy Stus book and thank me later.

SLOW DEATH BY UNIFORM PART III (Disassociating the mechanical systems of the shirt and vest)

Injury prevention

Poorly designed uniformed shirts are a real pain in the neck…literally. They are the number two culprit on my list of reasons why your uniform wrecks your body.  Generations of cops have been using uniform shirts with polyester blends that have no give when pulled tight. So what do we do?  Pull them tight over a semi ridged vest. The vest and shirt combine to create a rigid mechanical system. Think about it like this: early airplanes were constructed by stretching canvas over a wood frame because it was light and made a mechanical system rigid enough to withstand the forces of flight. We do the same thing, but instead of achieving something cool we cast ourselves into the hunched back, forward head on neck shape.  Your x-ray of the bone spur on your neck is pretty cool I guess.

bone-spurs

The shape of your uniform is important.

If you’re going to have a form fitting uniform shirt that doesn’t give then it had better fit

img_0811

Do you know the actual shape of your uniform shirt? Look how far forward the collar is from the rear of the shirt. Any idea why cops might have issues with their neck and thoracic spine?

you perfectly. The number one thing I look for is the shape of the upper back and how the collar sits on the neck. Ideally you should be able to stand up and sit down in a good position without any increased pressure on the neck. Remember I said in a good position. We tend to hack this problem without thinking about it. The tension of the collar on the neck is a noxious stimuli so your body tries to avoid it. It has two choices:

  1. You can thrust your head further forward which at first seems ridiculous until you look around and see how many cops look like Skeskis from The Dark Crystal.
    skeksi11

    +10 super nerd points if you knew who Skeskis was.

  2. The other option is the getting all puffy chesty. You can sit in a ribs flared shape with an overextended low back sometimes called “sway back”. This rotates mechanical stress to the back and away from the neck. Biomechanist Katy Bowman might argue that it’s actually rib thrusting and not over Whether it’s overextension or thrusting, it’s going to take its toll on your low back.

One key cue for standing and sitting in a better position is “rib cage down.” Try the basic bracing sequence and have a seat in your squad car. The vest will rotate down with your rib cage and your shirt will tag along pulling your head forward. If you lower your ribs and you feel your head/neck being pulled forward like you have a Flava Flav clock necklace hung round your neck, your uniform is poorly shaped. This exacerbates forward head on neck issues that spread to your thoracic spine and kill shoulder function.

IMG_2647.GIF

Pay attention to the collar here. Just think about the kink in your neck you need to have to be uprightish with this shirt. That a massive amount of tension to fight against.

You can be laser focused on your position and fight the mechanical force pulling on your neck, but you will eventually lose position with your shirt collar pulling forward on your neck for hours.

If you find that this is an issue you can tuck the rear of your shirt in last and extra tight to try to pull some tension on from the collar away from the neck, but this is ultimately a temporary fix. Your shirt will work its way back and ends up looking like a soup sandwich and still puts pressure on your neck. Just give it a re-tuck and order a better shirt.

img_2649

Tension on the back of the shirt.

The material your shirt is made of is important.

Chances are you’ve noticed how much more comfortable a training polo is pulled over a vest. This is largely due to the fact that most polo shirts are not only shaped better than common  uniform shirts but most cop polos are now made with athletic fabrics that have a little stretch and give. Find a uniform shirt with similar qualities if you can, and your neck will thank you for it.

An exterior vest is a superior option.

aristotle

Who would have thought he was talking about 21st century police?

Putting the shirt under the vest disassociates the juggernaut of a single mechanical system into two lesser systems. Putting the shirt under the ridged structure of the vest keeps it from being pulled too tight, allows for slack and therefore less tension on the neck. Don’t have an exterior vest? Just try it with your concealed vest real quick to prove the point. Compression forces still pin the shirt between the vest and your body will keep them loosely connected but it’s fairly minor and easy to adjust for.

Final thoughts

Simply enough having a uniform shirt with a head hole that comes out of the top of the shirt instead of the front made of stretchy athletic fabric that is placed under a vest is about as good of a situation as you can get. It’s still far from perfect, but remember the realistic goal is less bad. It’s still on you to spend time on daily maintenance especially getting in some thoracic extension to undo what we cant mitigate at work.

SLOW DEATH BY UNIFORM PART II (THE REAL PROBLEM WITH THE DUTY BELT)

Injury prevention

Sitting as much as cops do is disastrous to say the least, but add in the duty belt and it’s a whole new level of suck.  If you really want to take a whack at resolving your low back pain, you need to understand two quotes. The first from Jazz Musician Lena Horne:

“It’s not the load that breaks you down, it’s the way you carry it.”

And the second from Physical Therapist DR. Kelly Starrett:

“Your pain has a position.” 

From these two ideas I came up with the concept of “uniform dynamics.” I’m looking at the body as a mechanical system that has a primary function of movement. I see the uniform as a load on the mechanical system. If you start to break down the how the load affects the mechanical system you can start to see the real issues at hand.

When we look at the duty belt it’s so easy to blame the weight, but the weight is hardly the primary offender. If we take the focus off the 10-12 pounds for a bit, we can start to see the forest through the trees and realize that the pain we have is due to position.

I like to call the issue the artificial impingement. This problem occurs in our hips because we have a large block in the front of the hip, usually a magazine pouch and Taser, but it can be anything on your belt and the belt itself.

To illustrate take your right arm and bend at the elbow through full range of motion. You should be able touch your hand to your shoulder (unless you’re super jacked). Do it again but add in a mechanical block or “impingement.” Make a fist with your left hand and put it in the crease of the elbow on your right arm and flex.


What we have here is a model for what’s going on in the hips with the belt. The difference is the spine is composed of several joints and happens to be more bendy than the humerus so our back can still work around the issue in order to sit in the squad car. This working around the issue is the position that causes our pain.


bill

Meet Bill. I can’t draw so bill is the best I can do with shapes feature in word.

bill 2

Here bill is sitting down with the duty belt causing him to round his low back to work around the blocked hip. This makes Bill’s back hurt


Throw on your duty belt and bring one of your knees into flexion until you start to meet resistance in the front of the hip. For most the hip starts to come on tension between 30 and 45 degrees of hip flexion. Is that enough range of motion to sit? Absolutely not but our body is pretty quick to hack this issue, so we can externally rotate our hips and sit on the side of our butt and we can use the low back to bend around the impinging blockage and still sit “uprightish.” This is really an ugly position so if you want you sit more upright and work on your posture you can leverage your psoas against the spine to overextend it and all of a sudden you’re resistance training it for hours on end. Fighting against the duty belt with muscular contraction gets old, so we start to see adaptive shorting of the psoas and now or back gets really pissed off.

bill 3

Bill doesn’t like to slouch so he can crank on his low back with the psoas muscle. This makes bills back hurt too.


young backs

Fresh young backs with a low hanging duty belt.

tring to work it out

Moments later the same fresh young backs working around the duty belt block.

not okay

A closer look at the low back and hip position. Ask your chiropractor or physical therapist if they can see what might be causing some back pain.

The answer becomes fairly simple. Remove the artificial impingement by raising the belt. Still got your duty belt on? … good. Grab the front of the belt and pull it up out of the hips and raise your leg again. You’re much closer to 90 degrees and with that extra range of motion you can sit in a “less bad“position and save the world…with less back pain.


bill 4

Bill removed the block in his hip and now he doesn’t have the extra forces pressing into his back. This makes his back hurt less.


high belt

With a high belt this takes a lot of pressure out of my back and hips. Note: That’s the vest protruding over the duty belt and resting just on the top of the magazine pouch… Not my gut. There is still some pressure on my thigh but it’s not near what it is with a low belt.


low belt

Here I unleashed the Crackin and let the duty belt hang low. The difference is subtle but you can see the rotation of the magazine pouch pressing into my thigh and low back. I also have Here is a classic example of leveraging the psoas to sit upright.


bill 5

Bill has one final option with a low belt blocking his hips. Bill can adjust his torso position to meet the angle of his belt. He can still keep a braced spine and lean back. The only problem is Bill has a cage in his squad car so he can’t lean back far enough.


The high duty belt was fairly popular in the mid 1900’s era of law enforcement when they adopted the Sam Brown duty belt. The single strap was a mechanism to lift he belt out of the hips and remove the impingement. The Sam Brown belt started to be pulled from service when departments realized that it was an officer safety issue having a strap that a suspect could grab onto. For most departments the Sam Browns went into storage only to be used for ceremony and enter the modern day low hanging duty belt, an utterly unmitigated disaster of that has wrecked backs for generation after generation until present day.


Check out this cop from the 1940’s. The belt is well above the crease of the hip. Also look at how how much less equipment he has to put on it.


The best option I can think of is ditching the belt altogether and transitioning to a load bearing vest. There’s a great debate about the appearance and fear that it looks too militarized to the public. A pretty effective middle ground solution is the suspender system.
When it comes to uniforms having a professional look that is functional and allows for good body mechanics is a difficult balance. Many departments won’t allow exterior suspenders. They also provide the same officer safety problem as the Sam Brown. The market has two really good solutions out there right now. The first is the back defender, which is what I use. It is an under the uniform shirt suspender system that conceals the straps nicely.  The second is the Blauer Armorskin solution. This product uses an exterior non-load bearing vest and suspenders under the vest. Having the shirt under the vest has other mechanical advantages which I’ll get to another time.

The quick and free fix is that you can pull the front of your duty belt up and out of the hip every time you sit. Unfortunately this is just another thing to think about and the fix is only as good as your ability to do it. You can also take a little time to rearrange your belt to facilitate better hip flexion. Got something that hangs way below the belt? It probably shouldn’t be in the front of the hip…I’m looking at you Taser. This idea of the artificial impingement also explains why our more “puffy” coworkers are likely to have more back pain. With a larger belly you start to run into resistance sooner and have to compensate more to complete the arduous task of sitting. let’s be honest, if you’re like most cops you can probably stand to drop a few pounds while you’re at it.

Removing the artificial impingement is a huge step toward sitting in a better position. Let me be clear, This is not the magic bullet. It’s really just a less bad, and I think a best, current option. The uniform has other issues that I’ll address in the upcoming weeks. Even if you have the best possible uniform you still need to find a way to sit less and do some daily maintenance to your body if you’re ever going to get ahead of the problems causing your pain.

Slow death by uniform (PART 1)

Injury prevention

Breaking news!!!! The modern police uniform is uncomfortable. Okay maybe not so newsworthy but I’m going to spend the next few weeks explaining how the uniform causes mechanical compensations that trash your body. When I say trashes your body I mean it TRRRRAAAAASAAAHHHHEEEESSSSS your body.  If you’re a uniformed officer, this is something you need to read and understand.

To realize how bad the uniform is we need a standard of movement to test, something that’s scientifically validated, widely used, reliable and a good predictor of injury. Enter Gray Cook and the Functional Movement Screen.

What is the Functional Movement Screen?

Think of the screen as standardized field sobriety tests for your movement quality. It uses seven movement tests all scored from 0-3 and three clearance tests which are not scored but simply look for pain.

0 Means you have pain in the movement pattern.

1 Means you can’t perform the movement pattern but have no pain.

2 Means you can perform the movement pattern, but it has some issues.

3 Means you have are competent in the movement pattern.

The screen also looks for asymmetries in the movements.

Predicting injury

If you score below 14 you are at an increased risk for injury during physical activity.

If you have asymmetries you are at an increased risk for injury during physical activity.

If you score a 1 on any test you area at an increased risk for injury during physical activity.

The goal is to have a total score above a 14 with all 2’s or 3s, no pain and no asymmetries.

The experiment

I’m not certified in the FMS, but I do have some coach friends down at Catalyst Strength that are. They were cool enough to screen me three times: the first with my normal gym clothes, the second with my best looking uniform, and the third with my modified working uniform. Using the gym clothes screen as my baseline, I wanted to see how much of an effect the uniform really has on my movement and how well I’ve mitigated it.


The results

My gym clothes score was a 19, well above the 14 mark which means I move pretty well and I’m not at increased risk of injury.

In my ultra-professional snug fitting version of my uniform, my score dropped down to a 12, below the cut point of a 14 which is a bad thing.

My working uniform scored above the cut with a 16. Still not as good as the gym clothes, but at least it’s above the cut here and theoretically moving well enough to be not at an increased risk for injury based on score. I did have some ones and asymmetries, so there is still need for improvement.

Gym clothes

pro uniform

working uniform

Implications

Movement quality and injury are related. At the most basic level the intent of the screen is really to see if someone moves well enough to increase physical activity without increased risk of injury, and it’s not like we’re hitting the gym in full uniform (By the way you cops that run marathons in full uniform—good job raising awareness for whatever it was but bad idea for your body). The reality is, however, on any given night you need to be able to run, jump, fight etc. in what you’re wearing, and I’m not sure which movement pattern we can assume is okay not to own when we need to do those things. Adjusting your uniform may be the difference between going home or to the hospital after a scrap.

We can only assume that spending thousands of hours in a uniform that causes dysfunctional movement patterns will eventually start to affect your movement when the uniform is not there. This also highlights the need for a maintenance program. Your body will mold to your activities. It turns out that experts can look at skeletons and tell what kind of activities the person did. For example, they can observe twisting from repetitive rotational forces in the arm of a major league pitcher. I’m willing to bet they could pick out a cop’s jacked up skeleton out of any lineup.  Needless to say you have to do something to undo the 40+ hours a week of slow death you’re putting your body through.  I move pretty well without my uniform despite the fact I spend about 1800 hours in uniform a year. I also have a movement maintenance practice. That is the difference.

Final thoughts

I see cops posting online all the time trying to find studies to use as proof that their department needs to make a change to the uniform. Unfortunately most replies are personal and anecdotal at best. I find this concept really interesting but my sample size of one and obvious bias make this experiment inadequate, so more research needs to be done. (Any grad students out there looking for thesis research topic? Millions of cops may love you someday.)

The FMS should be considered as a part of a department’s employment screening and any annual physical testing. Consider testing when a uniform change is made. Adding a tool to your duty belt? Get screened. Getting new pants? Get screened.

Uniforms could be much more “movement friendly” if manufacturers joined the minimalist movement, minimalist (according to Katy Bowman) meaning having the least amount of impact on function, not necessarily referring to the amount of material used. Sorry Lt. Dangle. The challenge is simple: develop a uniform that looks good, can lug around all the standard duty equipment and has the least effect on your FMS screen…. Then hook me up with some cash for the idea.

Over the next few weeks I want to break the problems down a little more in depth. Stay tuned because these may be the most important articles you read all year.

For more information on the functional movement screen

http://www.functionalmovement.com/site/aboutfms

http://graycookmovement.com/?p=51

http://graycookmovement.com/

Defusing the time bomb that is your shoulder.

Uncategorized


Injuries happen. When they happen we blame the activity at hand and quote Roger Murtaugh saying something lame like “I’m getting too old for this…..” In reality age has a lot less to do with our injury than the fact we didn’t do anything to prevent it. During my short history in law enforcement I’ve seen more cops get sidelined for shoulder injuries than anything else. Know anyone that has murtaughtrashed their shoulder recently? Ask them what they were doing to prevent it. I’m betting the answer is a blank stare.

Your crappy shoulder mobility is a ticking time bomb. It’s way past time to start working on some shoulder maintenance strategies. The implications of your junky shoulders go well beyond the obvious torn rotator cuff or dislocation injuries that come to mind when you think shoulder problems. Even if you don’t outright injure your shoulder it’s responsible for pain in more places than you think.

Do you have neck pain? Fix the shoulder.

Do you have back pain? Fix the shoulder.

Want to prevent pectoral tears? Fix the shoulder.

What about your elbow problems? Big surprise, fix the shoulder.

The list just keeps going.

If left unchecked sitting in a squad car in uniform all day will trash your shoulder mobility (Are you starting to notice a common theme with my writing here?). Spending year after year in a squad car with your shoulders in midrange flexion and anterior translation (shoulder sitting in the front of the socket) is a massive maladaptive positional load to overcome. It quickly becomes your default position which is not where you want it to be if you’re trying to be powerful and injury free.

By the way if you’re a big into bench and biceps curls there’s a really good chance your show muscle has you locked in some crappy positions and the timer is ticking faster. Don’t get me wrong I like getting a sweet pump from a good chest and arms session too, and nothing is specifically wrong with either exercise, but too much focus on both really shortens the pecs and biceps and will age your body faster than chain smoking in tanning booth.

 Your shoulder is an officer safety issue.

Almost all of us know a cop that jacked up their shoulder while scrapping with a suspect at work. Chances are they fought through the pain won the fight and got the arrest. They dealt with the pain for a few days, weeks or months before finally getting it checked out and ended up under the surgeon’s knife and off the schedule. Despite our best efforts to be safe the same thing happens during training. Think about the last time you practiced handcuffing at defensive tactics. How many guys took it way too easy or avoided being the suspect because of their shoulder? What about working on joint locks? Have you ever worked on an Americana or Kimura at ¼ speed and the guy playing suspect is tapping before it’s locked in? Yeah we’ve got serious problems if we can’t drill important skills at speed and be safe about it. These techniques can be effective but need to be trained often and sometimes at full intensity. Practicing them puts a stress on our bodies and too many of our compromised shoulders can’t handle it.  If the training is not safe or effective then what’s the point? Ask your departments’ workman’s compensation provider how they feel about you drilling some ground fighting skills. I’m willing to bet they prefer you do something else because with little doubt they will be paying out for something.

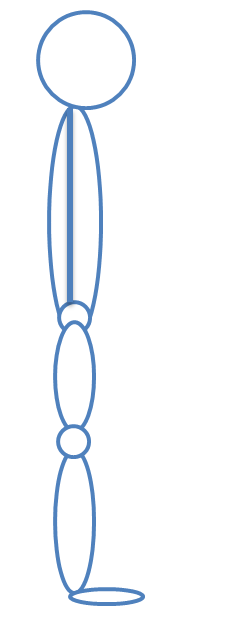
I wish I could tell you that I had a quick fix for this problem, but it’s going to take some work. Step 1: Keep working on thoracic spine extension. Step 2: You have to pay attention to your shoulder position at work: retract the shoulder blades just a little bit and keep the shoulders back. When you see yourself defaulting to a hunched over shoulder forward position slap yourself of the wrist and make a better decision. Step 3: Start building some shoulder maintenance into your life.

Introducing the MAWAP® © <———My idea, you can’t have it, but I’ll let you use it…. For a nominal fee.

Crossfit may be the king of popularizing the use of acronyms in the fitness world. They got WOD- Workout Of the Day, AMRAP- As Many Rounds As Possible, EMOM- Every Minute On the Minute. Here’s one they missed MAWAP- Move As Well As Possible. This is a workout that has very little to do with rep volume and how many rounds you perform. Frankly it’s the anti-AMRAP. The purpose is to work in as much time under tension in various positions as you possibly can while moving. Going slow makes it harder and more effective.


mawap

Proof I made MAWAP up. Just saying.

One of the many knowledge bombs I picked up from Pavel Tsatsouline’s book Kettlebell Simple and Sinister comes from the section about the benefits of preforming the Turkish getup slowly. Pavel uses the example of martial artists preforming katas real slow to expose flaws in form and balance that would otherwise be rushed past and unnoticed. After perfecting movements at slower speeds the accuracy and quality of movement at full speed is impressive.

What we’re shooting for is mastery of shoulder positions but I’ll happily take simple competency for now.  I can’t stress this point enough. Slow it down. I guarantee if you do you will find out why less is more.

The proposed version of workout is a half hour long and should give you plenty of time under tension in these positions to not only mobilize the shoulder but give you a pretty solid workout even if you only do one round. In fact if you are moving the entire time and you only do one round you can consider yourself a beast.

If your shoulder is a ticking time bomb consider this the bomb squad.

We’re going to utilize variations of the animal movements you haven’t done since elementary physical education in combination with some loaded pushes and carries alternating movements in a down and back fashion. The goal is to work on mobility and stability in as many shoulder positions as possible. 30 min MAWAP.

A quick aside about the animal movements and P.E. I’ve only practiced these movements once since school and that was training for a GORUCK. Even being involved in fitness most

goruck

My extremely broken crab walk several hours into the GORUCK

of my life the benefit of these movements never dawned on me as anything other than a method of fitness torture until recently in a moment of satori that was like Daniel LaRusso figuring out that wax on/wax off was actually allegory for deflecting an attack. It turns out these movements are just ways of challenging full expression of shoulder mobility under body weight load. Those tricky gym teachers are smarter than you think.  waxon_waxoff_application


The movements

Push– For this I used my trusty Westside butcher sled. If you don’t have some sort of push sled then use a vehicle with training partner behind the wheel, or just push the training partner if you have one heavy enough to create enough resistance. Whatever the load is, make sure it’s enough to make you grind a little and move slow. Depending on your forward lean and torso position this can be analogous to the press (vertical torso) or overhead position (forward lean).

FullSizeRender(2)

FullSizeRender(1)


Bear Crawl– I like the knee-less bear crawl because it really gets after end range of shoulder flexion. Think about hitting your best possible downward dog and move. Take slow small steps across the yard using the pattern hand, hand, foot, foot. Focus on how this reaching overhead while keeping the shoulder stable in external rotation (get the creases of the elbows pointing toward your fingers) and did I mention to move slowly?


FullSizeRender(8)

Good extension here but my elbows need to rotate so the creases are pointing toward my hands.

Crab walk– This is the arguably the most beneficial movement of the workout. Shoulder extension (arm behind the body) is the key here. If you can, take the kink out of the hips Squeeze the butt and get yourself in a straight line from your shoulders to your knees. Open the chest and feel the stretch in the biceps. The goal here is a little closer to the yoga position of tabletop than what you remember crab being. Call it walking table top if you want I don’t care. Take your time and do the best you can. A lot of cops are going to be missing shoulder extension so scale this to be as safe as you can.

FullSizeRender(7)

FullSizeRender

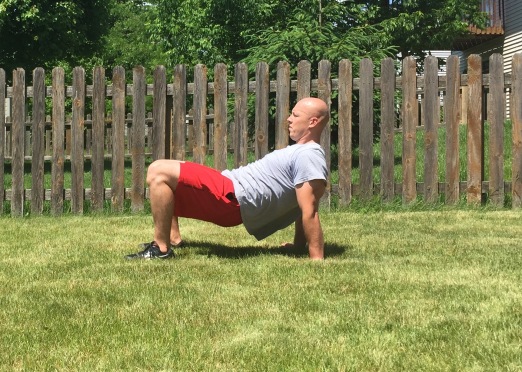
If your hips need to drop, let them drop take a few steps and press back up into table top. Ideally you will have fingers pointing toward your feet. This stabilizes the shoulder with internal rotation. If you’re missing that you can let the hands turn out a little but keep working on it.


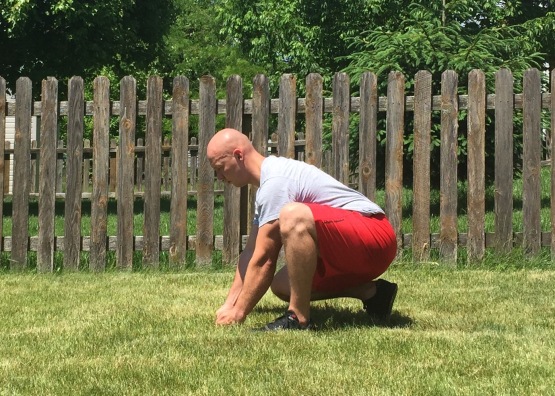
 Ape walk–  Bend over, touch your hands to the ground, then drop your hips all the way down and try to posture your torso up until the weight is about 80% on the feet 20% on the hands. The shoulders are going to reach forward a little here. Suck the shoulder in and keep the lats turned on to keep it stable. It seems to work best if you keep the pattern foot, hand, hand, foot.

FullSizeRender(10)

FullSizeRender(11)


Sandbag bear-hug walk – After I get the bag into position I prefer to grab the bag with closed fists and focus on pulling the weight into my body with the shoulders. You have a couple options with bag position:  1) you can keep it vertical and hug the bag with your arms in the center or 2) start to challenge yourself with a horizontal bag and use over-the-top grasp. If you have to start bending your legs to support the weight from underneath, you either need a lighter weight or a stronger grip position.

FullSizeRender(4)

FullSizeRender(5)


Farmer walk– Few things hammer posture and rotator cuff stability better than a farmer walk. Pull your shoulders back just slightly and grab the weight just a little off center to the back so it tips forward a few inches. Flex your triceps and you’ll get a fantastic stretch in the biceps to undo some of those preacher curls while you’re at it. I’m fortunate enough to have some farmer walk handles but a couple of big dumbbells or kettlebells will work just fine.

FullSizeRender(3)


Overhead walk– Pure stabilization of flexion and external rotation here kids. If you don’t have a good overhead position then this may not be for you for a while. If you can’t do two weights overhead try one sided overhead walks. If you want to make it harder do a one side overhead in combination with a heavy farmer carry in the other hand.

FullSizeRender(6)

Putting it together

On the experimental trial I did 30 minutes of this in the back yard which is about 50’ fence to fence.

Prowler push down, Bear Crawl back

Farmer Carry down, Crab Walk Back

Ape walk down, sandbag bear-hug walk back

Overhead walk down start over with prowler push and repeat until the timer says stop.

And that’s pretty much it. The day after doing this my shoulders felt strong so I gave it a try and crushed a personal best on a strict kettlebell shoulder press. Maybe that was coincidence but probably not.

You can modify according to the implements you have and your ability to get into any of the shapes. I’ll only judge you a tiny bit if you don’t have a bag of sand, kettlebells, a prowler and some farmers walk handles available in your garage or gym. Experiment with it and try new movements.

 Q: Should you do the animal moves forward or backward?

A: Yes and maybe even laterally or not at all if necessary.

 You’ll reap benefit from variety here. I’ll use the crab walk to explain why. When crab walking feet first you see that you load the shoulder in less extension and use the movement of your body to bias it into more extension. If you move head first you’ll see that you have to use active shoulder extension to move your arm back and stabilize before receiving the load of your bodyweight. If you want to go laterally you can apply the same ideas to some horizontal abduction and adduction. Even vary which hand or foot you lead off with will make a subtle difference as you grind this one out.

If you find that you absolutely cannot get into a shape and move then get in the best version you can and perform a static hold. When you’ve had enough, walk down and move on to the next movement. Take your time and do it right. What happens when the bomb squad goes fast and screws up? BOOM!

Lethal_Weapon_Complete_Collection_Red_Wire_Bomb

Murtaugh may be too old but Riggs is reckless, has a crappy shoulder and can’t defuse a bomb…. Just saying

If you fear this workout is beyond your physical ability just alternate some downward dog and Crab/table top static holds for about 10 minutes a couple of times a week to get started. Work them into walks and start adding everything else.


 Final thoughts 

This thing is great for the shoulders but I can’t ignore the other pieces this workout hits. This post is getting long so here are the bullet points of some of the other benefits.

  • Spending time with your hands on the ground hits wrist flexibility.
  • The various forms of crawling challenge hip and ankle mobility and motor control.
  • The farmers carry works on grip strength and posture mechanics.
  • The sandbag bear hug walk challenges posture and breathing mechanics.
  • Pretty much everything can be used to challenge reflexive trunk stability.

It’s time to start reintroducing full range of motion to your shoulders. Take your time and whatever you do don’t force or rush any part of it. Your body can take months to adapt, and you’ve got a ways to go. Keeping that in mind this is not a one and done experiment. Work it in about once a week or so for a few months and defuse that bomb. You’ll be stronger, able to trainer harder and safer for your efforts.

Stop doing that twisty back cracky thing in the car and how to use your back cracking professional better.

Uncategorized


We have all done it. We pull the steering wheel with our left hand, press off the passenger seat with the right and twist… twist…. twist until pop. Sweet sweet release in the low back. The action itself may not be bad. I’ve heard it argued both ways: 1) you will die a slow and painful death by degenerating the joint, and 2) the contrary being that it’s probably not a big deal as long as it’s not super habitual, which might result in some damage to the joint capsule.

What happens when you “pop” a joint?

The gist of what my simple brain can understand is this

  • Your joint has a capsule full of fluid and gas.
  • When you pop a joint you are releasing the gas, which is the audible noise you hear.
  • Also during the popping you have a release of endorphins that provides a near instant mechanism for localized pain relief —part of the reason popping your back feels so good.
  • The other reason it feels good is that it’s believed the pop stimulates the golgi tendon (which is a nerve bundle that helps regulate the tension of a muscle) and the nearby muscles relax a little.

So what’s the big deal?

Studies on habitual joint popping which focus on degeneration on the joint don’t outright prove its a a problem. Here’s my real issue with it: Gray Cook, a really smart physical therapist and strength coach, drives home the point time and time again that if you do something to change position and movement you have to challenge it so the body will graycook.pnglearn to be stable in new positions and ranges of motion. It’s like hitting save on the word document. If you make adjustments or change to your body your next position and the load on that position are really important. As mentioned above, when you do the twisty back cracky thing you stimulate the golgi tendon and trigger a release in muscle tension which opens up some new range of motion.

Sooooo…. what is your next position? Probably more sitting in the car hanging the end ranges of your soft tissues and bony structure in a crappy position.

What is your low back not doing while sitting in a squad car in uniform? Stabilizing in good position.

What are you reinforcing?

Absolute best case scenario that I can see (Which by the way I don’t think is the case); you’re doing nothing. You’re just doing it again in every 20 minutes because it does feel good and you’re chasing the high (You freaking junkie).

More than likely You pop your back, and you prime the region for input for input and learning. Now you’re further normalizing sitting in the car in a crappy position.

Furthermore, while we know positional load is important for shaping our bodies, we also know that repetition is a good teacher as well. If you’re cracking your back in your car all the time you’ll probably gain some rotational capacity. This might atZoolander first glance seem okay until you consider that you can’t do this well both ways. Next thing you know you’re making confessions to your shift partner like Derek Zoolander and you have asymmetrical rotation that happens to be unstable which can be a powerful combination for injury.


I know I’m getting long winded here but let me add in one more knowledge bomb from Gray from his thinking on the joint by joint approach

The lumbar and sacral region has a tendency toward sloppiness and therefore could benefit from greater amounts of stability and motor control. This region sits at the crossroads of mechanical stress, and lack of motor control is often replaced with generalized stiffness as a survival strategy.

Do you see where I’m going here? There’s a pretty good chance you’re setting up for catastrophe. While the joint popping itself might not be so bad, it’s easy to see how you were setup for that back injury you got scrapping with the drunk on the side of the road. The good news is that your body is pretty good at trying to avoid catastrophic injury. If you’re lucky you end up with a little back tweak while picking your kid up that only puts your back on lock down for a few days so you learn to make a better decision. By the way, when it’s half healed you know what feels really good? Doing the twisty back cracky thing in the car. 3-dodgeball-quotes

While we’re on this path of thinking.

A chiropractor or physical therapist they should be using the same principle of reinforcing change. If they don’t it’s kind of like getting home from the grocery store and pitching half of your groceries immediately into the garbage. Have you ever gotten adjusted and feel great until you get back in the car and drive home? All of a sudden it’s not as quite as good as when you left the office or even like you never went? … Weird (This is also due in part to the endorphins wearing off).  A lot of practitioners skip this step because let’s face it time is money and that back cracking degree wasn’t free. The dirty little secret that they don’t tell prospective practitioners before they take out student loans is that paying them off with insurance company’s reimbursement rates isn’t as easy as they think. Don’t get me wrong they can still make positive improvement with adjustments but the guys that take the extra step seem to see me fewer times for whatever issue I have.

It turns out that a good physical therapy or chiropractic session might look something like a solid yoga session.

First you make a change (stretching). Then you challenge position within the new range of motion (static and balancing postures). Rinse and repeat. Finish up by taking a little time with deep diaphragmatic breathing in a good posture. Usually standing tall (mountain pose /Tadasana) lying down (corpse pose /Savasana) or some variation of sitting cross-legged (easy pose /sukhasana or lotus Padmasana).

 Note: This isn’t necessary a universal principal in all yoga practices, but I see it a lot. I really don’t think the similarities are a fluke.

If you like your back cracking professional but they skip this step, that’s fine. Just be aware of the issue and take some ownership of your body. It’s not rocket surgery. Get yourself into a good position, and find a way to challenge it. A good hard style plank, a Cook hip lift or two and maybe loaded carry will work great. At a minimum practice some neutral spine bracing and diaphragmatic breathing while you walk around for a few minutes. Whatever you do don’t just go directly to your car and sit in a compromised position for the next half hour while you drive home. If you can walk to and from your appointment do that too. You can do great things with a little bit of knowledge and a pinch of effort.

That’s just my basic understanding. It’s also easy to go much more in depth with these ideas and build some really good ways to hit save on your movement practice.  Gray Cook is better at that than me so I’ll let his video give you a good example.


Final thoughts.

Do you have any idea how hard it is to write a blog post about not cracking your back in the squad car then go sit in a squad car and not crack your back? Probably about as hard as reading the same post and not go crack your back in the squad car. As a way to combat the urge try this for a nifty low back massage from the inside out.

NOTE: Don’t do this if you have a known hart condition.

  1. Sit as upright as you can. (Think sit tall).
  2. Exhale all the air that you can. When you think your out start making the “SSS” sound to get the last little bit out. You should feel your abs get tight your rib cage tilt down during this which helps align your diaphragm and pelvic bowl.
  3. Keep your belly tight and breath in and out into your gut. Try to keep your belly firm and in place so your breath pushes into your low back.
  4. Just hang out and try this for a few minutes.

AAAAANNNNNDDDD you’re welcome. Ironically enough the first time I did this I got an amazing clunk deep in my sacraliliac joint. It wasn’t the same as the air bubble pop. It was more like something slipping back into place and my hips felt great the rest of the night. If you get that you’re double welcome.

Restoring the T- Spine

Uncategorized


Okay Officer Hunchback, it’s time to address your thoracic issues. The bad news for you is that having a rounded upper back can be the gateway to back pain, neck pain, shoulder pain, and more pain (and by the way you cant press as much weight overhead). The good news is that you can work on your thoracic spine, start relieving all that pain and be more awesome at pressing weight overhead.

Fun fact for all of the Keith Cushman  (the kid from Jerry Maguire) fans: The human head doesn’t weigh 8 lbs. Okay I’m sure some do but it’s usually estimated at 10-12 lbs according the googles. It’s widely quoted that for every inch your head of forward of center, the stress on your neck increases by another 10 lbs (I didn’t find the study but have seen the textbook  Physiology of Joints by A. I. Kapandjii cited as the source)  Is your head 3 inches forward of center? Well that’s like 42 lbs of stress on your neck so…. way to go you overachiever.

The vest/uniform shirt combined with sitting in a squad car is a powerful combination that will Quasimodo you in a hurry if you’re not cognizant of position and fail to take corrective measures.  If you’ve let this go on long enough your spine is probably stuck. It’s bad enough that trying to stand up straight like mama said won’t quite cut it. Even going through a solid bracing sequence wont quite get the T-spine where it needs to be.  You’ll need some amount of force to restore extension. Don’t have a chiropractor in your pocket that can adjust you before and after work? Give this a try.

Quick test: Can you keep your body in a braced position neutral spine position and put your arms overhead? If yes, check again make sure your rib cage is still down… cheater.


Not overhead. Try to load a kettlebell in this position and see how long you can hold it there.

Still not overhead. My hands are more vertical, but I’m cheating. Look extension load in the low back to get them there. Can you load this position? Yes you can. Do it enough and you’ll find out why missing thoracic extension can lead to low back pain.

Much better here. We have a flat back, the ribs are down and hands are vertical.  Not quite perfect, but this good enough to safely put some load on it.


NOTE: The overhead position is a great test and retest to look at improvement in T-spine extension but there’s a lot more work that can be done to clean his position up including soft tissue work on the chest, triceps, lats, and serratus just to name a few. We’re just looking for improvement. This post isn’t the end all be all for perfect overhead position. 

Foam roller extension level 1

Roll your back from the base of your ribs to your neck over the foam roller 20-30sih passes or until you stop noticing change. Focus on getting as much extension out of your thoracic spine as you can. Put your hands over head to make it a little more awesome. Feel free to roll side to side as you roll up and down to get the ribs moving too. By the way if this makes you want to vomit, chances are your tissues are junky. But on a more serious note if this feels like it’s aggravating any injuries then bail. Go see your chiropractor, physical therapist or other qualified professional.


This my friends is flexion of the T-spine, you might start here to make some superficial passes but you need to work on getting that upper back as extended as you can to try to restore normal position. If you’re stuck here keep working and think about relaxing over the roller. Foam rollers are really big and soft so if just doing this is causing discomfort, you got some work to do kiddo.


Here we are looking better with a flattish back. Remember flattish is extension in comparison to today’s standard kyphotic rounding. Even when you get here, keep working to bias your t-spine into extension.


Here’s a good variation to get some snap, crackle, pop going. Hug yourself, hang your head back and slowly steamroll the foam roller toward your head.


Throwing the arms overhead really cranks up the extension tension. The function of the shoulder blades and the thoracic spine are so intertwined that they’re inseparable as a functional unit when it comes to putting your arms overhead (hence our earlier test) Hit this position before you even think about putting weight overhead in a military press, snatch, jerk or anything.


You can drop your hips and use that to bias a more globally extended spine. You can keep or leave  dropping the head back here. (my head looks like it’s gonna explode for a reason, and it’s not because this is without discomfort for myself).  If you’re actively dealing with some low back issues, keep your butt active and squeeze it a little to prevent too much low back extension.


You have a variety of options here Use what works for you in your current situation.

Foam roller extension level 100

Alright, now it’s time to turn it up a notch. Grab a weight, put it on your chest, hug it and start rolling out your back keeping the focus on thoracic extension. Use what you can of all the above mentioned techniques in combination with a huggy weight. The hands overhead variation is tough here but you can place the weight on the ground above your head. Grab the weight and use it to anchor your arm into a stable position as you bias extension.

I use a 40 lb medicine ball as my “huggy weight.” You can use about any weight you have accessible. kettlebell, bumper plate or even your two year old child…. yes I’ve done it, and it worked.

Work on extension joint by awful joint.

The foam roller is great for restoring multi segment extension but sometimes we need to be a little more precise and a little more severe. A couple of lacrosse balls taped into a peanut of death or a MWOD Gemini work great. Take a few light passes up and down the length of the t-spine first to get warmed up. Then settle in, let the shoulders and neck lay on the ground and lower your hips using the peanut as the fulcrum to work on each joint individually. Let as much as your trunk contact the ground as you can. Think about breathing through your back into the peanut, and work gently in and out of flexion and extension taking several reps at each segment. Work all the way up to your shoulders from the base of your t-spine/ribs. Add your huggy weight to really ratchet it up here.


I promise this feels good.


Do what you can with the foam roller and peanut variations. If it’s ever so much discomfort that you find that you can’t relax or, take a full breath in and out, readjust and/or back off a progression.


The squishy balls soft tissue smash.

When we need to unstick some junky fascia and reset muscle tension softer balls are clutch . The harder and larger implements work better for forcing your spine into extension and can get some of the soft tissue work done but inversely, a softer ball will do some of some of the extension work and seems to work much better on the soft tissues of your back. The reason they work so well is that they are a little more grippe and create a little more shear between tissues and they yield to bony prominence allowing them to get into some nooks and crannies that harder balls bypass.  I love pinky balls for this. The older harder version are my favorite but they’re becoming more difficult to find. The newer softer versions of the pinky ball work fine too but at they’re a little softer. Jill Millers Yoga tune-up balls are also fantastic. You know what Jill Miller also has that’s fantastic? This video on a ball sequence to work on the back and neck.


Think about restoring extension before/after work, and always make sure its there before you start putting weights over head. I highly recommend doing the softer ball work a little before you go to bed…. Aaaaaaannnnnnddddd you are welcome. I’m serious it’s money for turning on the “off switch.” When  I take the time to do this I need fewer pillows bolstering my head and neck and I sleep like a rock.


Becoming a modern spartan ” The 300 challenge”

Uncategorized

The title of Kelly Starrett’s book Becoming a Supple Leopard comes from  the concept that you should have full capacity of your body readily available at all times. The leopard doesn’t go through a dynamic warm up, stretch out and foam roll before it takes off at a dead sprint to do leopardy things. The leopard is just in a state of readiness so it can do what it needs to whenever the opportunity arises.

I can’t think of any segment of the human population that the supple leopard concept applies to more than the modern law enforcement officer or soldier. No other professions require a higher state of readiness. We are required to be able to go from sitting in a car for the better part of eight hours to getting into a foot race, wrestling a suspect to the ground or fighting for our life in all out war without the opportunity to warm up  and mobilize. It’s really an insane requirement that cops are trying to meet every day.  Instead of the supple leopard I like to call it being a modern spartan. 

It’s a massive undertaking to maintain this state until retire. I hate to say it but the ugly truth is that most of us aren’t there.  Even if we forget about the requirements for speed, strength, power, endurance we’re still working with limited capacities  of our body which leads to injury and that’s not good enough.

In my Last post I talked about restoring hip extension and feeding some slack into the front of the hips. At first glance it sounds counterproductive to say that sitting in flexion is the enemy shortening anterior structures of the hip and extension is the fix. In the next breath I say you need have more hip flexion. Guess what. It turns out that sitting in a squad car in mid range positions wrecks flexion too so basically the average cop is really messed up and stuck in a crummy position. To work on flexion we’re going to use the the deep squat. Not only does it challenge hip flexion but it gives us a look into the other problem areas in the feet, ankles, and back which we’ll talk about over the next few weeks.

Time for a little reality check

Squat down while you read the rest of this blog.  I’m talking allllll the way down. Like thighs below parallel, can in the sand chilling on the street corner of a third world nation squat. Seriously, if you’re somewhere that it is at least somewhat socially acceptable and you don’t have any known injuries that prevent you from squatting give it a try. If your job requires you to run, jump, wrestle, fight or whatever without warning you should be able to squat for the next few minuets.

When’s the last time you squatted like this and held it for any length of time? For cops that don’t intentionally work on this position, the question is answered with a surprisingly simple and accurate mathematical formula:

Years you’ve been a cop  Forever = Last time you squatted and held it.

It’s not just cops but most humans  in industrialized nations don’t spend enough time in this position. In the first episode of MOBILITYWOD, DR. Starrett introduces the 10 minute squat test and makes the claim that nations with populations that sleep and toilet on the ground have very little hip and low back disease. I couldn’t locate the research that makes that claim directly but did find an interesting study that states high income nations are 2-4 times more likely to suffer from low back pain than low income nations so Starrett’s claim seems to hold water.

Check it out here:  The epidemiology of low back pain in the rest of the world. A review of surveys in low- and middle-income countries.

I’m going to suggest that your performance in 10 minute squat is inversely correlated to the likelihood that you do or will have back pain. If I’m correct  then we can decrease back pain by improving competency in the squat. It’s not so much the squat itself that addresses back pain but having a bodywith the attributes that can be stable and comfortable in the bottom of the squat is a body that is less likely to have problems that result in back pain.

The 300 challenge

The objective is to accumulate 300 minutes of squatting an eliminating free time couch sitting for 30 days. Think of this as a 30 day cleanse for your hips and back. If your good at math then you probably figured out that I’m just applying the 10 minute squat test every day for 30 days.

The idea is to use cumulative dosing to get you comfortable in the position. I’m talking about FIVE HOURS throughout the month in a squat. After the month hopefully you’ve mastered the test and are comfortable in this position. All you need to do to maintain it is use it in every day life. Squat down to play with the kids, grab something off of the bottom shelf, organize the fridge, change a tire or whatever. Try to accumulate 10 minutes every day using the squat. That’s something like 2.5 days of squatting in a year! Use the test periodically to check in and make sure you haven’t lost capacity.

Let me be clear… 10 minutes of legit, unsupported squatting in one session is the end goal. The first few times you try this it will humble you.  It doesn’t have to be a perfect squat and you might need to break it up into multiple sessions for the first few days with a minimum dosage of two minutes per session.  But we’re working toward the goal.

Some pointers on the squat

Want to start an online argument in the exercise and fitness community? Try to teach the squat. A lot of smart people out there teach the squat differently and argue that their way is the only and best version of the squat. Here’s the deal… the best way to squat is going to depend on the task at hand and individual lifter anatomy. Without getting overly specific, here are some basics.

  1. Like everything else we start with a braced neutral position
  2. Initiate the squat by setting the hips back to load the hamstrings.
  3. Keep the shins vertical as long as you can.
  4. Keep the knees over or slightly outside the feet, don’t let them collapse in.
  5. Maintain even pressure throughout the foot.
  6. The squat isn’t legit until your hips are below your knees.
  7. Maintain a flat back as deep as you can. We’re unloaded here so rounding at maximum depth isn’t the end of the World.

Keep even pressure throughout the foot. All three points should be in contact with the ground at all times.


Don’t over-complicate the squat. If you need more instruction,  just look at the natural squat of a toddler. It’s beautiful and effortless. These photos were taken simply by asking my kid to squat. ZERO instruction required. Frankly her position is immaculate and not trashed by a destructive environmental load.

Scaling the squat test 

If your body is lacking the capacity to get down into the squat then we can start by simply mimicking the squat position by laying on the ground with your butt as close to the wall as possible and putting your feet on the wall to get you in deep squat position.


If you can squat but need a little help maintaining stability or just need some help with endurance while you’re down there we have a few different options available.

Back to the wall. This allows a substantial amount of support and increases demand on the legs and torso from the feet on the wall option.


Grab onto something solid. A door frame, squat rack or training partner works great. This allows you to have more control over your position. You can pull forward with your arms to control your torso position and adjust demand on our ankle. You may find that just pilling with two fingers is enough assistance.

Use a counter weight. It doesn’t take much weight to change your center of gravity just enough to take some of the demand off the ankle and allow you to maintain a more upright torso. Holding an object in both hands also allows you to stabilize your thoracic spine through external rotation of the shoulder.

Power band around the hips. It helps keep you upright and allows for freedom to work toward an unsupported squat. The power band also forces you to push your knees out to maintain a stable hip. You really have two options here: 1) Arms in the band 2) Arms out of the bands. In the band creates a more stable position. Arms out of the band requires you to generate a little more stability on your own.


No sitting

As for the no sitting portion of the challenge. No unnecessary crappy sitting for the month. You’ll still sit when required to at work or other like situations. But we’re focusing on the extra mid range sitting here.  You can still sit but use the floor and if you use the couch then sit in half lotus, crossed legged, legs straight, or really crank up the hip stability with full lotus. Don’t forget there is always kneeling, half-kneeling, or you could just squat and do the couch stretch during your down time.


Use your best judgement here talk to your doctor, chiropractor or physical therapist before you start if you think you need to. If you can’t get near this position without excruciating pain that’s not good enough.  Work with them on a plan to get a legit 10 min squat because theirs a high likelihood that’s the plan that gets you out of pain.

Believe me this challenge is a worthwhile endeavor. Make the commitment and keep working the couch stretch too. After learning to stand and work from a neutral braced position, maintaining full range of motion in both extension and flexion is an obvious second step to becoming a modern spartan and a pain free cop.


rect6894

Restoring hip extension.

Uncategorized

If you’re sitting in a squad car all day you’re going to be short in the anterior (front) hip. Realistically you go days without bringing your hip into extension for any meaningful amount of time.  You might spend some time in neutral while standing but you spend almost no time in hip extension. When you don’t get into extension your body adapts to this flexed hip paradigm and shortens the hip flexors. When these structures get short it creates passive tension in the system and becomes a major contributor to anterior pelvic tilt, overextended lumbar spine and ultimately back pain.

My first post addresses pelvic tilt from motor control standpoint. Now it’s time to start feeding some slack into the system to relieve the passive tension that’s dumping you pelvis. Lesson one still applies, don’t forget to stabilize the trunk and pelvis as we work on extension.

Step 1 Spend more time standing- Siting too much is the problem it only makes sense that standing more mitigates the problem. When you stand you need to stand well. If you let your pelvis hang out all dumped forward and don’t level it out while you’re standing the relative position of your hip and thigh is still in flexion.

Step 2 Spend some time in the half kneeling position- Gotta do something on a table or desk? Ditch the chair when you can and go down to one knee. Get your down knee behind the hip to bring it past neutral into extension. Use some padding on the down knee if you need it.


Step 3 Torture yourself with the couch stretch- Simplistic and evil the couch stretch is the best way to open the front of the hips.  Kelly Starrett popularized it in the second episode of MWOD.  Think of it as a runners quad stretch on steroids and PCP.

The setup– Start on all fours and place one shin against the wall with your knee in the corner of the wall and floor. The opposite foot steps forward into a lunge position.


Squeezing the butt and driving the hip forward in this lunge position might be enough for starters. If this is all you can handle that’s fine. This is still extremely effective. Work from this position until you’re ready to go vertical.

The stretch- Squeeze your butt, drive off of your front foot, bring your hips forward and posture up.  The words tear open the hip come to mind here but in this case it’s a good thing.

All of the slack is pulled up by extreme knee flexion on the vertical shin. When you bring your hip to extension it’s really something special… in a painful want to throw up but still a good thing kind of way. Chances are that you will pull the knee out of the corner of the floor and wall. That’s cheating and you’re robbing yourself of maximal hip extension. Don’t be that guy.


When you’re able to keep posturing up until you can get your back upright and parallel to the wall without overextending your low back. If you get all the way up make sure your butt is still turned on and hang out for a minimum of two minutes. If you can’t squeeze your butt then back off a little bit.

If you need a little support to posture up a PVC pipe works great in this end position.


When to do the couch stretch

It’s a great option for cops before and after a shift. Your hip is going to be in mid range flexion for an extended period of time so prep for it then undo the damage of your shift as soon as you can.

How to super charge the couch stretch

Front foot elevation – If you want to take this stretch to a level that might be outlawed by the Geneva convention put something under the front foot to raise it up a few inches. We want quality stretching not just a circus trick here so if you can’t do this and keep your butt turned on then stick with the original recipe couch stretch for your extra crispy hip flexors.

Power band hip extension assisted torture hell– You know that spot where your butt meets the rest of your thigh? Stick a power band there and wrap the other end around something solid to assist your hip into full extension.

If you don’t have a squat rack to tie a band to then a kettlebell or a trustworthy training partner works well too.


Work on it

The couch stretch is not just something you try every now and then. I know it can suck big time but you need to take your medicine and dedicate some serious time to working on it. Several times a week if not daily is not unreasonable. Keep practicing it until you get comfortable doing it. When you got it mastered keep working on it to maintain hip function. Don’t forget you’re still sitting way too much. Full hip extension is the first half of complete hip mobility. Next week we’re going to work on some full hip flexion in the deep squat.